RAF Tarrant Rushton, Bomb Store

Details
This section just covers the Bomb Stores, how it looked, how it looks and how it worked.

Nose Fuze.
RAF Tarrant Rushton, Bomb Store
Details
RAF Tarrant Rushton, Bomb Store

AM plan
Details
Bomb Store: -
Schedule of Buildings
Bldg. No. - Building - Construction -Type - Drg. No.
93 - Petrol Installation (Aviation) - C (72,000gal) = 9846/41.
94 - Fused & Spare Bomb Store - N
95 - Latrine - TB - 9026/41.
96 - General Purpose Hut - N
97 - Pyro Store - N - 12725/41.
98to99 - Incendiary Bomb Store - N - C - 4734/42.
100to103 - Bomb Stores - N - D - 3164/42.
104to107 - Incendiary Bomb Stores - N - B - 4737/42.
108to109 - Components Store - N - 4733/42.
110to112 - Fusing Point Building - N - 4788/42 + 7900/42.
113 - Smoke Bomb Store - N - 4778/42.
114 - General Purpose Hut - N
RAF Tarrant Rushton, Bomb Store

1940's
Details
The bomb store at the far South East of the airfield. The square at the top left of the picture.
RAF Tarrant Rushton, Bomb Store

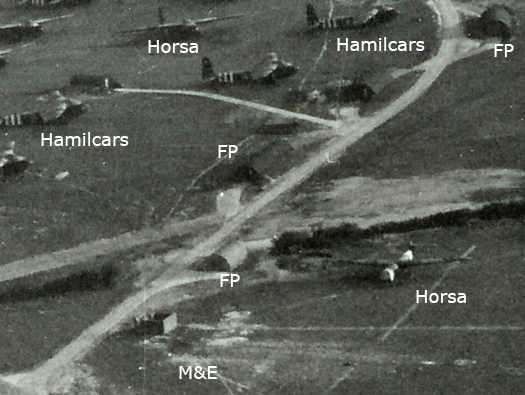
31 June 2010 ---------------------------------------------------------- 06 June 1944
Details
On the right - an original road that once crossed the down land.
On the left - the road to the bomb store.
The three fuzing points (FP) can be seen on this picture, also an M&E Plinth.
110to112 - Fusing Point Building - N - 4788/42+7900/42.
113 - Smoke Bomb Store - N - 4778/42.
118 - R.U. Bomb Container store - N -
15797/41.
M&E Plinth.

Plan.
RAF Tarrant Rushton, Bomb Store

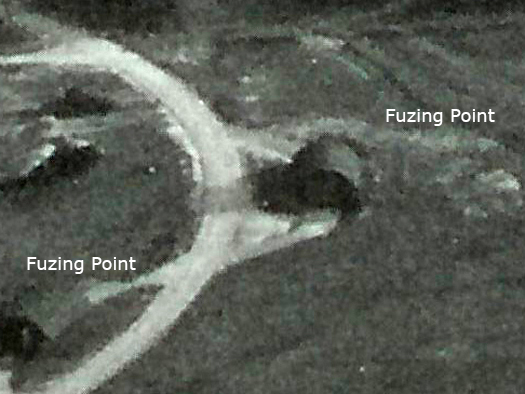
31 May 2010 -------------------------------------------------------------- 06 June 1944
Details
The road to the bomb store.
Left 111 - Fusing Point Building - N - 4788/42 + 7900/42.
Right 110 - Fusing Point Building - N - 4788/42 + 7900/42.

Plan.

Plan.
This is exactly what it would have looked like.

Fuzing point in Nissen.
RAF Tarrant Rushton, Bomb Store

31 May 2010
Details
Left - the lead into the third 110 Fusing Point Building N - 4788/42 +7900/42.

Plan.

Fuzing chart.
RAF Tarrant Rushton, Bomb Store

AIR 20-7587 - Photographs of buildings and plants on airfields in UK
Details
This is exactly what it would have looked like when fuzing the bombs. Specially trained senior Armourers in the ordnance branch would fuze the bombs and they would be watched over by the Ordnance Officer who was responsible to make sure everything was done correctly.
Fuze/Fuse both words expectable.
Plan.

Fuzing point plan.
RAF Tarrant Rushton, Bomb Store

31 May 2010
Details
On the right is to lead in roadway onto 110.

details

Underground quarry bomb storage.
RAF Tarrant Rushton, Bomb Store

13 October 2009
Details

Plan.
RAF Tarrant Rushton, Bomb Store

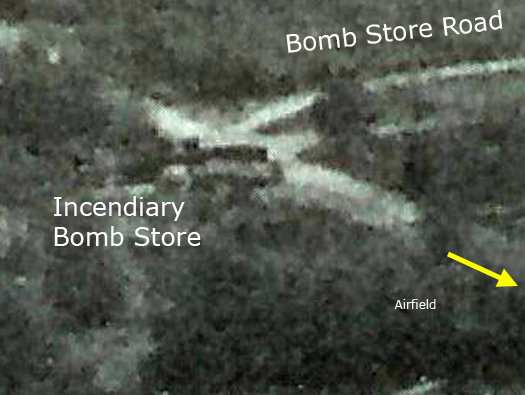
12 January 2003
Details
104to107 - Incendiary Bomb Stores - N - B - 4737/42.

Plan.

Plan
RAF Tarrant Rushton, Bomb Store

25 May 2020
Details
104 - Incendiary Bomb Stores - N - B - 4737/42.

Plan.

Plan
RAF Tarrant Rushton, Bomb Store

13 February 2000
Details
104 - Incendiary Bomb Stores - N - B - 4737/42.
Nissen hut 4737/42.

Incendiary carrier to fit into a bomb bay.

Incendiaries going down.
RAF Tarrant Rushton, Bomb Store

12 January 2003
Details
104 - Incendiary Bomb Stores - N - B - 4737/42.
Nissen hut 4737/42.
How it may have looked.
RAF Tarrant Rushton, Bomb Store

31 May 2010
Details
104 - Incendiary Bomb Stores - N - B - 4737/42.
Nissen hut 4737/42.
2010 And the wall had fallen down.
How it may have looked.

Boxes of Incendiaries.
RAF Tarrant Rushton, Bomb Store

AIR 20-7587 - Photographs of buildings and plants on airfields in UK
Details
104 - Incendiary Bomb Stores - N - B - 4737/42.
Photograph showing how they would have looked, with the berm of earth between the two huts..
RAF Tarrant Rushton, Bomb Store

31 May 2010
Details
104 - Incendiary Bomb Stores - N - B - 4737/42.
Nissen hut 4737/42.
The wall now on the floor and one hoop still standing.
-

Incendiary Bombs store 16ft Nissen Hut..
RAF Tarrant Rushton, Bomb Store

31 May 2010
Details
104 - Incendiary Bomb Stores - N - B - 4737/42.
Nissen hut 4737/42.
The wall now on the floor and one hoop still standing.

The vent from squares in the wall.
German incendiary bomb.
Armourers preparing incendiary bombs at RAF Marham, Norfolk. Having secured three cases of 4lb incendiaries in the Small Bomb Container.
RAF Tarrant Rushton, Bomb Store

31 May 2010
Details
The two roadways, left the bomb train road and right the bomb delivery road. All traffic one way.
RAF Tarrant Rushton, Bomb Store

25 May 2020
Details
100 - Bomb Stores Type 'D' - 3164/42.
Following the bomb train road along No.100. Two parallel roadways between the 3164/42 store, one is for delivering bombs and the other is for collecting bombs.
Each bay could holds 24 tons of bombs.
An order would go out to a station that an operation was on, all the details would be laid out, bombs, fuel loads, routes, codes, etc. Then the bombs would be ordered from storage. In this case it would probably be from RAF Dinton above ground storage/ RAF Chilmark underground storage in Wiltshire. They would arrive by lorry. The lorries loaded with bombs would drive down the parallel road to this one, to discharge their loads into the bomb storage areas. Then the day of the bombing raid, tractors with a train of bomb trailers often driven by M.T. W.A.A.F.'s. The bombs were loaded onto the trailers and trundled around to the fuzing point sheds. Here tail and nose fuzes would be inserted and then they were driven out onto the perimeter track to the aircraft on their dispersals.

Plan.

Plan.
RAF Tarrant Rushton, Bomb Store

12 January 2003
Details
100 - Bomb Stores Type 'D' - 3164/42.
This is the delivery road with its distinctive brick wall and four stores and their earth traverse

Plan.

Bombs arriving on lorries, taken off and rolled down into the storage area for 24 tons of bombs..
RAF Tarrant Rushton, Bomb Store

31 May 2010
Details
100 - Bomb Stores Type 'D' - 3164/42.
The delivery roadway. This was a concrete road and probably under the leaf mould and its still there.
Plan.
RAF Tarrant Rushton, Bomb Store

23 May 2018
Details
100 - Bomb Stores Type 'D' - 3164/42.
Plan.

52 ton bomb storage.
RAF Tarrant Rushton, Bomb Store

23 May 2018
Details
100 - Bomb Stores Type 'D' - 3164/42.
Trammelling a way of rolling barrels of beer from a horse drawn wagon to the cellar of a public house. In WW1 the same method was used to roll shells off of lorries & wagons. And then in WW2 the way to remove bombs from lorries down onto the bomb store floor, was to Trammel them. Ropes were tied to the rings set into the wall. (The rings are from farm suppliers to tie animals up at markets). Two ropes tied to the rings and then rapped around a bomb, using the weight of the bomb to roll it down in a controlled way. The bombs were reasonably inert, they needed a fuse to set them . So they could put up with some quite rough handling.
Lorries delivering.

Bombs would be unloaded from the lorries into the store, then when needed re loaded on low trailers to be taken for fuzing and then loading on planes.

Trammelling WW1 style.
RAF Tarrant Rushton, Bomb Store
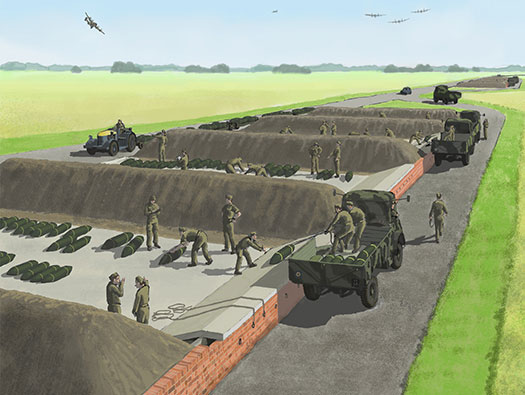
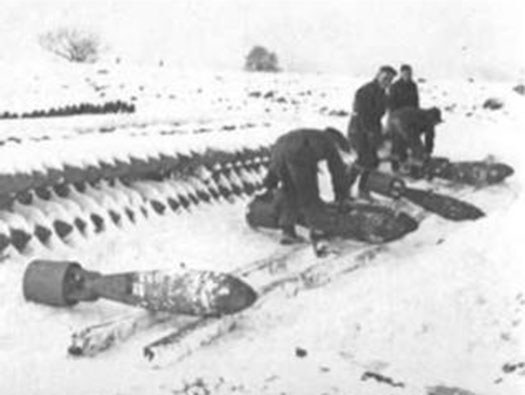
This was a picture to be placed on RAF Riccalls bomb store. ------------------- A snowy bomb store
Details
100 to 103 - Bomb Stores - N - D - 3164/42.
Small bombs from early in the war, later they just got heavier and stronger.
Plan.
RAF Tarrant Rushton, Bomb Store

12 January 2003
Details
101 - Bomb Stores - N - D - 3164/42.
Plan.
RAF Tarrant Rushton, Bomb Store

23 May 2018
Details
101 - Bomb Stores - N - D - 3164/42.
Plan.
RAF Tarrant Rushton, Bomb Store

25 May 2020
Details
102 - Bomb Stores - N - D - 3164/42.
Bomb train road.

Plan.
RAF Tarrant Rushton, Bomb Store

25 May 2020
Details
102 - Bomb Stores - N - D - 3164/42.
24 Ton storage area, blast walls either side.
Plan.
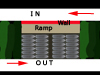
24 ton store.
4 x 24 ton bomb stores.
RAF Tarrant Rushton, Bomb Store

25 May 2020
Details
102 - Bomb Stores - N - D - 3164/42.
Delivery ramp.
Delivery.
RAF Tarrant Rushton, Bomb Store

31 May 2010
Details
102 - Bomb Stores - N - D - 3164/42.
Trammel ring.
Collection.
RAF Tarrant Rushton, Bomb Store

31 May 2010
Details

Plan.
RAF Tarrant Rushton, Bomb Store

31 May 2010
Details

Plan.
RAF Tarrant Rushton, Bomb Store

25 May 2020
Details
103 - Bomb Stores - N - D - 3164/42.

Plan.
RAF Tarrant Rushton, Bomb Store

31 May 2010
Details
103 - Bomb Stores - N - D - 3164/42.
Delivery wall.
RAF Tarrant Rushton, Bomb Store

31 May 2010
Details
103 - Bomb Stores - N - D - 3164/42.
Delivery wall.
Plan.
RAF Tarrant Rushton, Bomb Store

31 May 2010
Details
103 - Bomb Stores N - D - 3164/42.
24 Ton bomb store area. Bits found.
RAF Tarrant Rushton, Bomb Store

31 May 2010
Details
103 - Bomb Stores - N - D - 3164/42.
24 Ton bomb store area. Bits found.
RAF Tarrant Rushton, Bomb Store

31 May 2010
Details
103 - Bomb Stores - N - D - 3164/42.
24 Ton bomb store area. Bits found.
Plan.
RAF Tarrant Rushton, Bomb Store

31 May 2010
Details
103 - Bomb Stores - N - D - 3164/42.
24 Ton bomb store area. Bits found.
Lancaster & Lincoln break shoe. These bits are all left over from Flight Re fulling.

Lancaster II Hercules VI engine.
RAF Tarrant Rushton, Bomb Store

15 May 2000
Details
To the right the roadway taking you around to the Incendiary bomb stores.
Along here there are: -
97 - Pyro Store - N - 12725/41. A Nissen hut.
98to99 - Incendiary Bomb Store - N - C - 4734/42.

Plan.
RAF Tarrant Rushton, Bomb Store

31 May 2010
Details
Incendiary bomb store.

Plan.

99. = Incendiary Bomb Store = N = C = 4734/42.
RAF Tarrant Rushton, Bomb Store

31 May 2010
Details
99 - Incendiary Bomb Store - N - C - 4734/42.
Plan.

This plan is a 5416/40 but the basic design is very alike. A blast wall all the way around and a road running through.
99. = Incendiary Bomb Store = N = C = 4734/42.
RAF Tarrant Rushton, Bomb Store

31 May 2010
Details
Way out.
Plan.

details
RAF Tarrant Rushton, Bomb Store
March 1944
Details
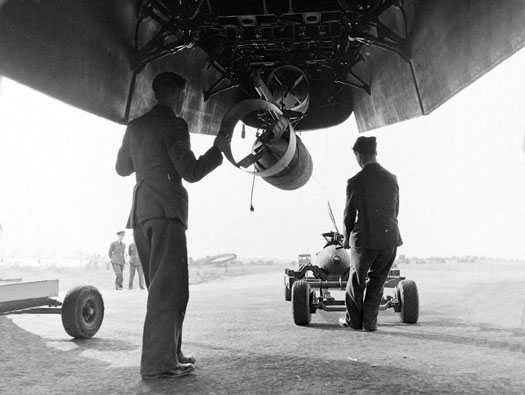
Bombing up a Halifax Bomber.
By 1944 nearly all Stirling´s and a lot of Halifax squadrons were being used for Airborne forces. The RAF did not have a dedicated transport aircraft (until the Dakota was brought in). Although these squadrons were used to tow gliders, parachute troops and parachute supplies. But they still had to be bombers and back up the Main Force for Bomber Command. So in between being used in airborne training, they could be called onto bombing missions. These were usually attacks on France, V Rocket sites, ports and railways.

Halifax bombing.
RAF Tarrant Rushton, Bomb Store

20 May 2020
Details
RAF Tarrant Rushton, Dorset MENU
 Norway (coming soon!)
 France
 Great Britain